This year is a whole lot of firsts. My first year turning my DIY skills into a business. My first year not running an advertising agency in almost a decade. My first year voluntarily owning plants (and fingers crossed, keeping them alive). AND it’s my first year participating as a guest in the One Room Challenge!

In early March I had started filtering through my copious amounts of ideas and notes for our half-bath to get a feel for the design direction I wanted to go in. As I’ve done countless times before I sought out The One Room Challenge’s blog and instagram and scrolled for hours to see what others were doing and pull inspiration from ideas I hadn’t considered before. I’ve been following the challenge for years now, and it was infinitely helpful when we started a “light reno” (😂) of this house two years ago. This time, as I was scrolling down my 10th guest participant rabbit hole, I thought, “why not me?”
Before I could overthink it I dove in head first by immediately filling out the guest application and here we are.
The Before
When we started remodeling this house two years ago it was because I woke up one morning at the beginning of COVID and I couldn’t take the heinous pale chartreuse wall color (paint the builders got at a discount), nor the basic finishes/ overall design of our master bath. Since then, I’ve spent 2 years with one goal in mind for this house:
Add bold personality.
For my first One Room Challenge I wanted something…manageable. Although if you stick around here long enough or follow my BS on instagram for any length of time, you’ll know that “manageable” isn’t really in my vocabulary. I’ve been told so many times that my ideas and timelines to execute them to perfection are “aggressive and delusional” that I’m 99% sure it will be the title of my first book and written on my tombstone.
Knowing this, I figured a small room to start would be doing myself the most favors.
What’s the smallest and most boring room in our house? Enter, the half bath. It couldn’t be more boring if it tried. I mean, try your hardest to not to fall asleep from boredom from checking out these before images:
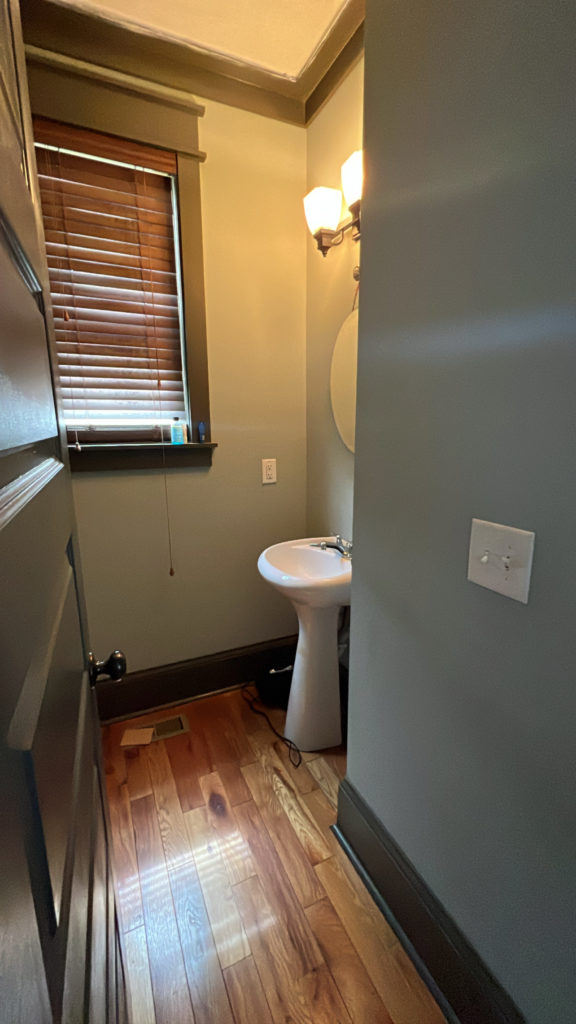
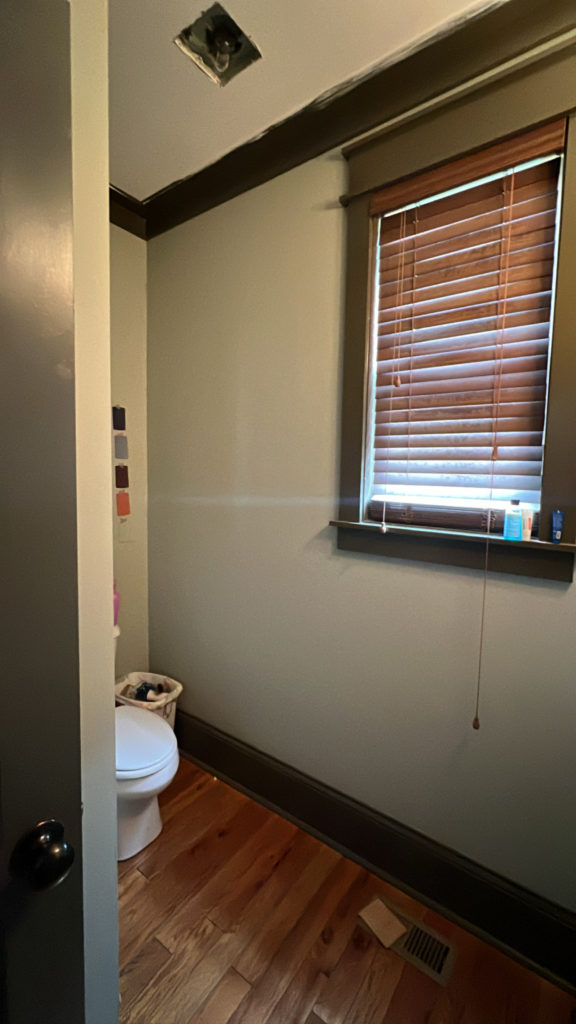

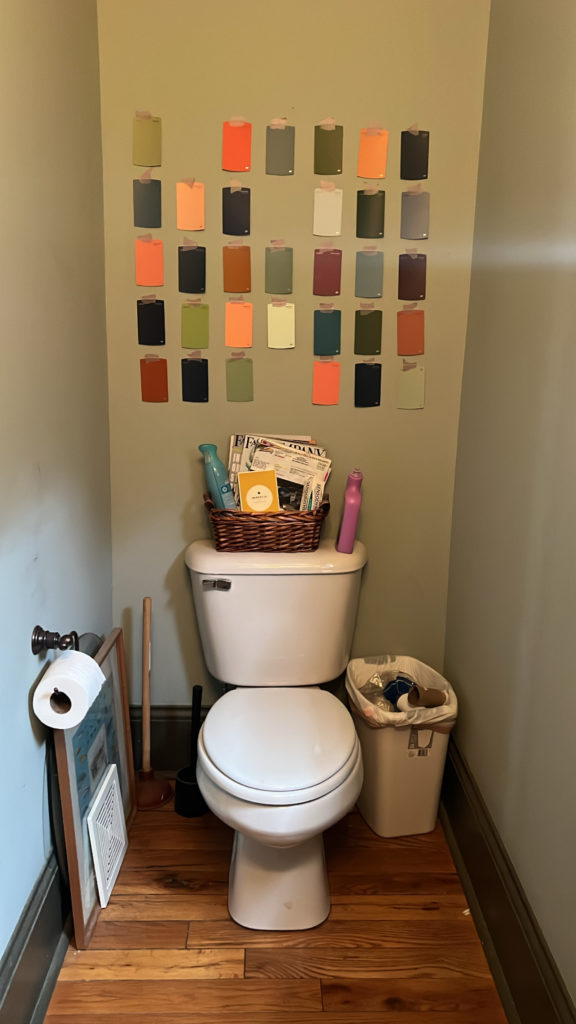
Is this not the perfect small space for a bold and dramatic design? It’s practically screaming it at us.
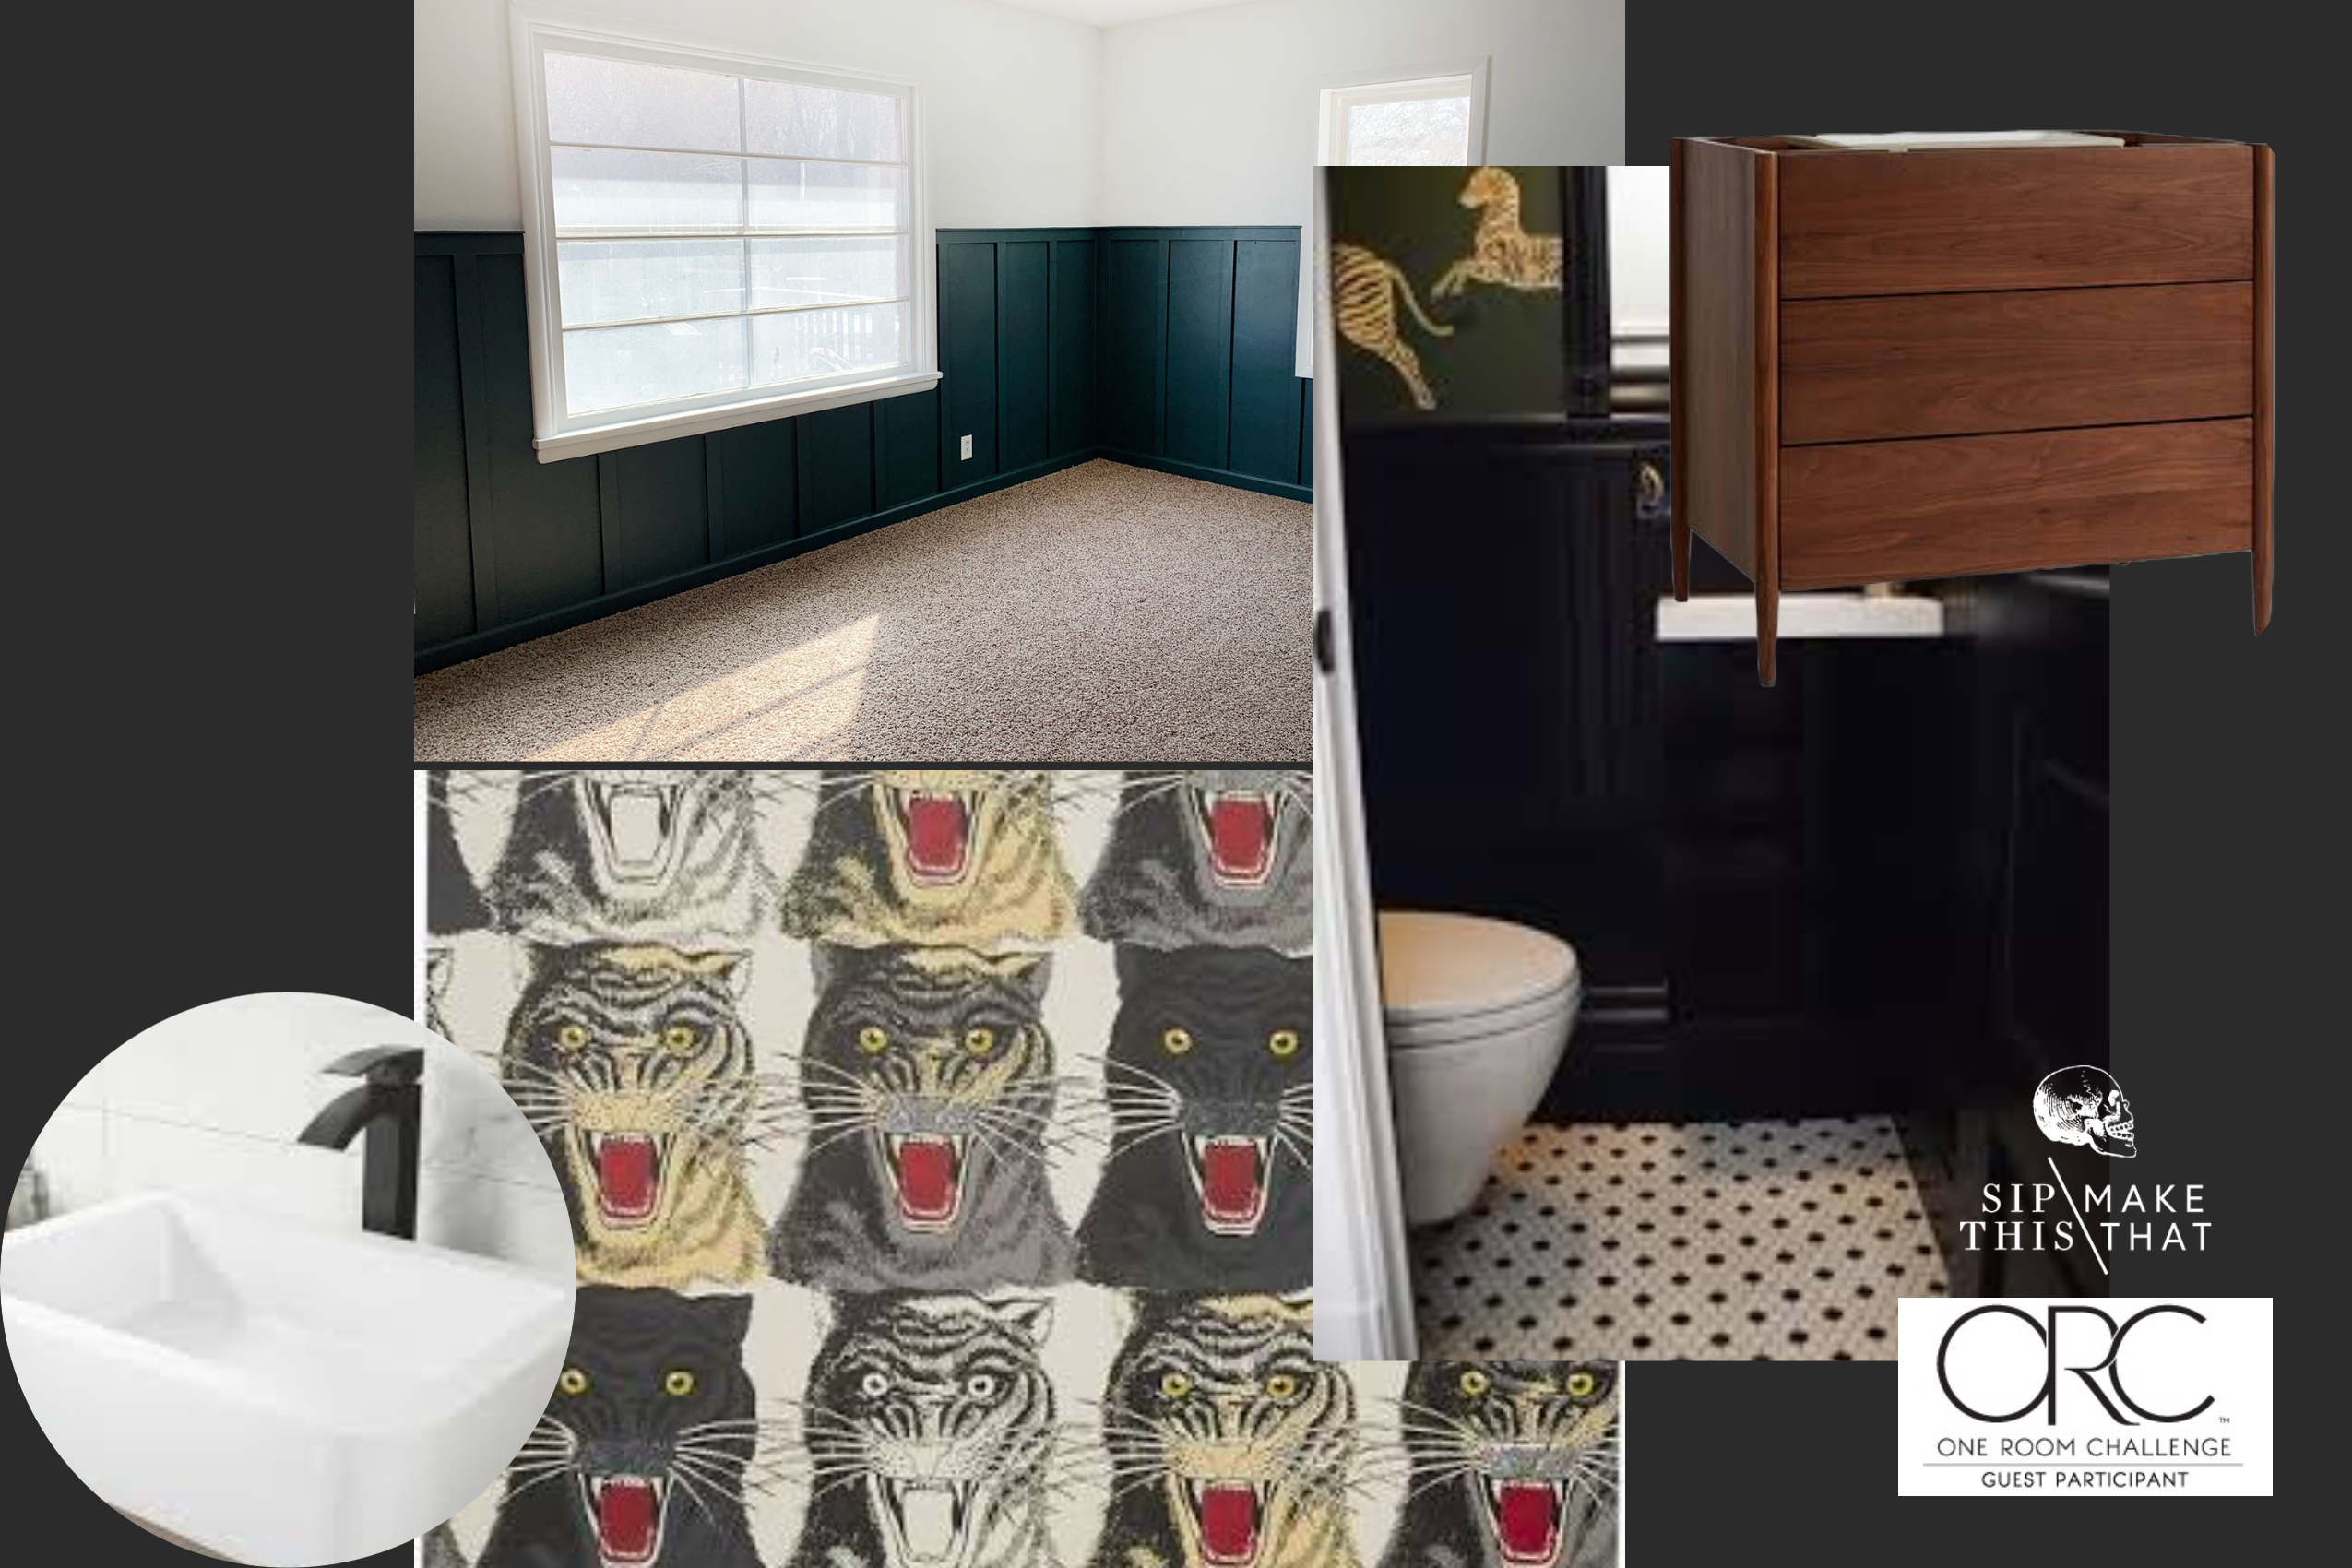
The Design
I love the idea of bold punches of patterns in unexpected places and so since we started this reno, I’ve been itching to try my hand at hanging wallpaper. Knowing the half-bath would make for an excellent canvas, I’ve been hunting for the perfect design for years. Some I’ve almost pulled the trigger on, but most I find to be…kind of boring? As in, not worth the cost and effort for something that won’t have the gut punch effect I’m looking for. I refused to get something that wasn’t giving me the same feeling you get when you know your wedding dress is *the one* and so nothing moved forward while I continued my search.
The search came to a screeching halt when my brother-in-law (who’s also in the middle of a full gut remodel on his own house) suggested I take a look at Gucci’s wallpaper options.
Holy. Shit.
My stomach started getting butterflies the second I saw it.

It was that perfect blend of bold, edgy, chic, exciting, pop that I was looking for. It had to be mine.
The price was more than I wanted to spend ($220/roll that covers roughly 75sq ft), but I figured I could bring the half wall of board and batten from our dining room into the bathroom and limit the wallpaper to the top half of the wall to stretch the budget.
On this note, I wouldn’t say I’m one of those let me show you how to do this “on a shoestring budget” interior DIY people, but I do know that I have champagne (or in this case, Gucci) taste on a craft beer budget. And I splurge + cut corners accordingly. My mentality is always that the project costs what it costs while trying to keep it “within reason.” Although to be fair, my definition of reason and my husband’s aren’t always the same.
This bathroom I’m trying to keep in the $800ish range.
With the wallpaper taking up a decent chunk of my ballpark budget, I need to make some tighter decisions on the rest of the space.
⚡️ I’ll be reusing the light fixture the same way I did in the other two bathrooms by swapping out the shades for an open geometric shade and LED daylight Edison bulbs.
⚡️ The toilet is staying.
⚡️ And I’m leaving the mirror, just swapping out the hanger.
But I’m sorry, the pedestal sink has got.to.go. That weird mark on it isn’t from us. It was installed that way. And our neighbors—who’s house was built at the same time as ours and is identical to ours—have the same one with the same mark. From what I know now of the people who did our houses, I’d be willing to bet they were a clearance deal of some sort.
We need a solution that has actual storage since this bathroom has none, so I started looking at what a vanity would cost. That was fun for about 2 seconds when I realized everything I would tolerate was at least $800 and up.
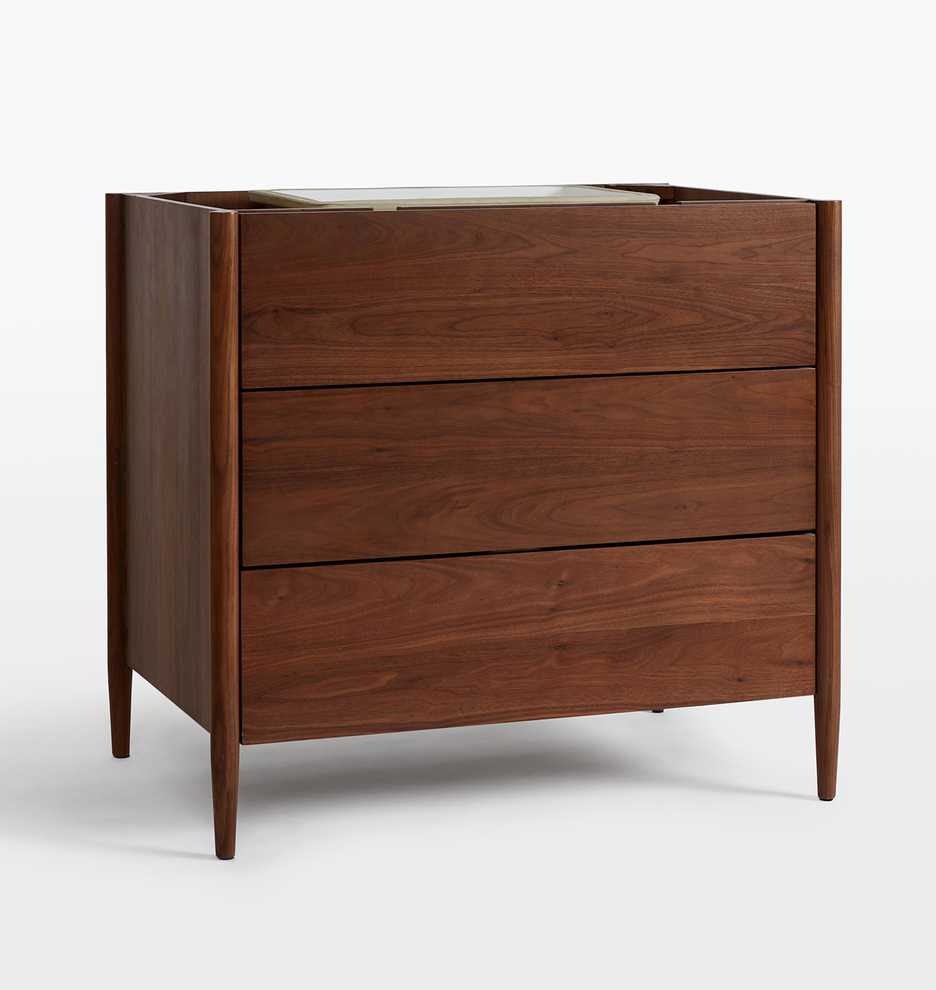
DIY it is! I’ve been wanting to try my hand at making my own pieces of furniture to supplement the pieces (and expand design possibilities) I’ve been flipping and give myself a new creative challenge. This feels like a great first learning opportunity as you won’t be able to view the piece “in the round.” Just the front will really have to live up to my perfectionist neuroses. I’m thinking the final cost here for a bowl sink, new faucet, MDF, stain, and front face veneer, will be in the $230ish range. My current inspo is something along these lines from Rejuvenation:
That leaves $350ish to go to paint, MDF trim, and things that will inevitably go wrong (like I might need another roll of wallpaper 😬).
For paint, I’m thinking Black Limousine from Behr in eggshell for the wall, semi gloss for the trim, and flat for the ceiling.
For the board and batten trim I’m going to use sheets of MDF (drylocking the pieces near the sink) that I’ll cut down into trim boards as opposed to already cut boards to save some money.
All together, my inspo board looks like this:
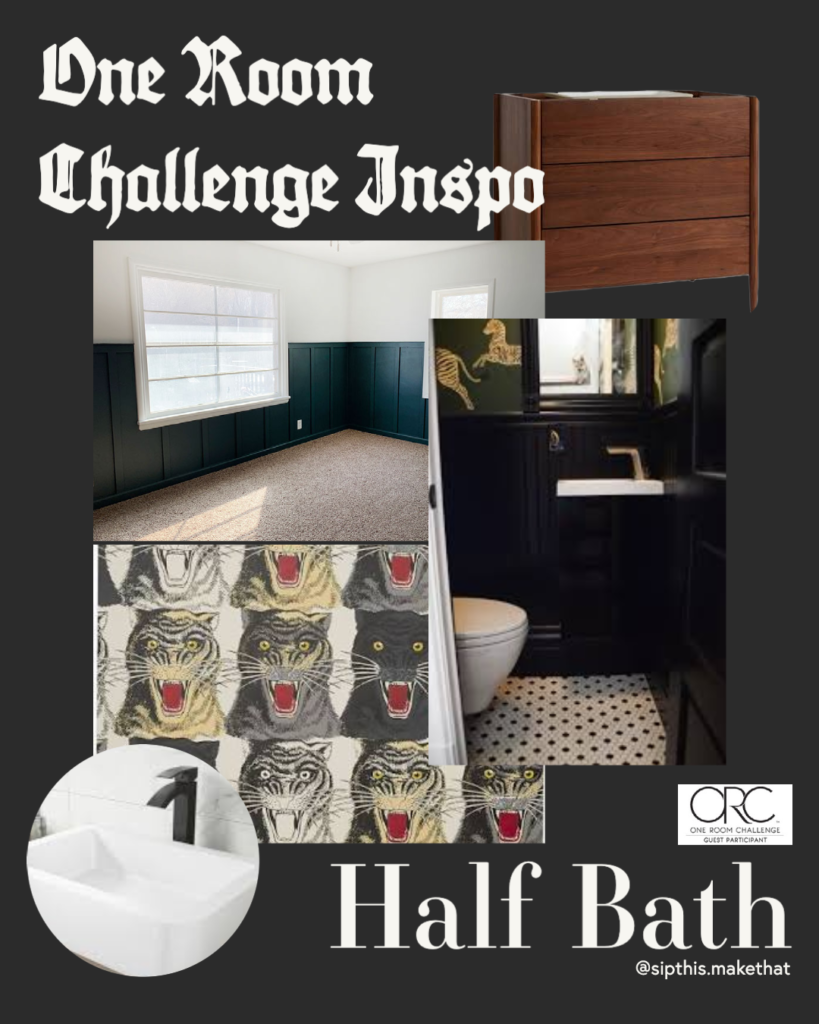
Fingers crossed I can get creative enough to make it happen in budget.
The Timeline
The One Room Challenge spans 8 weeks with the start date being April 6 and reveal week happening May 25th to the 29th.
Am I worried? Not really. With the space being so small and the wallpaper being so bold there isn’t much room to keep adding design features or changing up projects, so it feels like a reasonable amount of time.
(I can’t wait to re-read this in week seven and laugh at myself for that bit of naïveté.)
I’m thinking the timeline will roughly look like this:
Week 1: Paint ceiling and ceiling trim
Week 2: Hang horizontal batten/ prime for wallpaper / start wallpaper
Week 3: Finish wallpaper / Begin building vanity carcass
Week 4: Finish carcass / vanity top / Cut vertical batten / Prime batten
Week 5: Install batten / paint walls + board and batten
Week 6: Finish building and install vanity
Week 7: Install sink/faucet/plumbing
Week 8: Flex week/finishing touches
I’ve learned after enough spaces that it probably won’t follow this to a T and I’ll have to get real with recognizing my limitations, but come hell or high water, some variation of this design will be revealed sometime between May 25-29.
Ready or not, I’m in it now and excited to see the end result!
Link Roundup (what I know so far):
Wallpaper: Gucci
Light Shades: Lowes
Light Bulbs: Amazon
Mirror Hanger: Lowes Drawer Knob
Ceiling Paint: Behr Matte
Wall Paint: Behr Eggshell
Trim Paint: Behr Semi Gloss
One Room Challenge Blog


you said: