
Hallelujah, it’s over! We did it!
The half-bath is finally done after 8 long weeks. And it’s the high-impact, statement-making, dark and moody half-bath of my dreams.
Also, I’m pretty sure I’m never hanging wallpaper in a confined space ever again. At least not one that isn’t empty.
If you want to see videos of the 8-week process, you can watch them via Instagram reels or TikTok. I also shared the day to day updates over on Instagram stories in a highlight you can peruse here.
Without further ado (and before we get into what i would definitely do differently the next time around), on to the reveal!
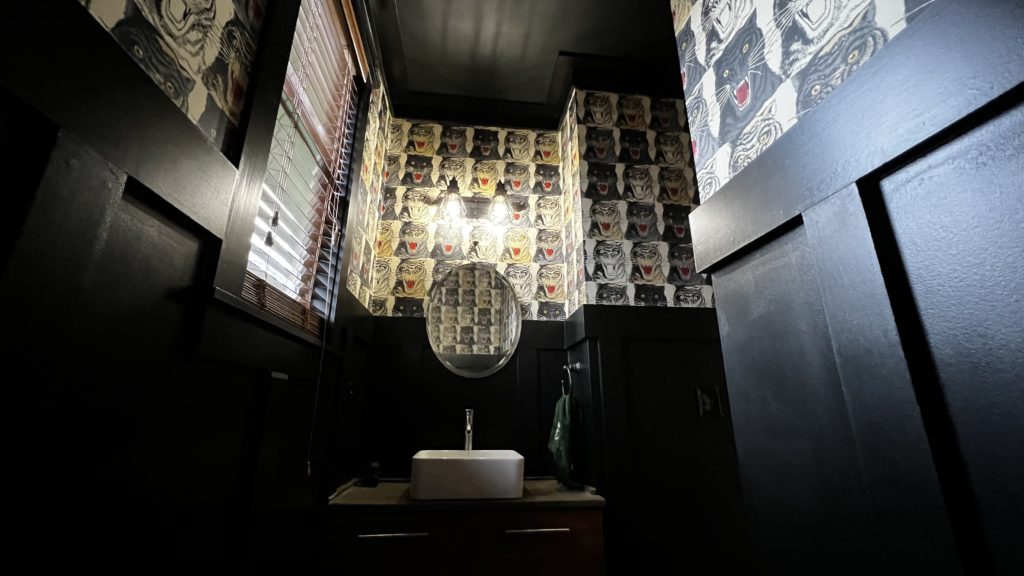
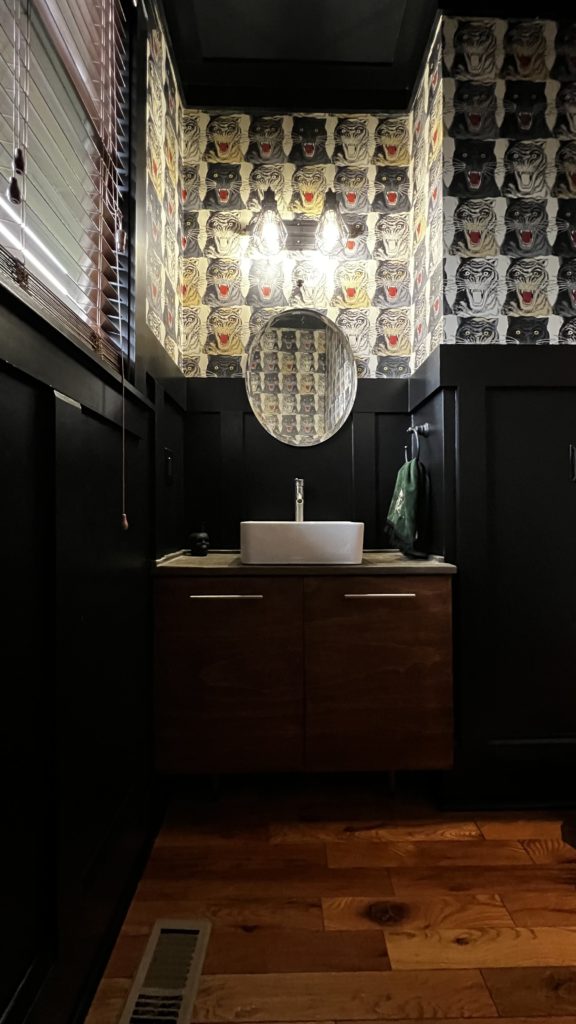
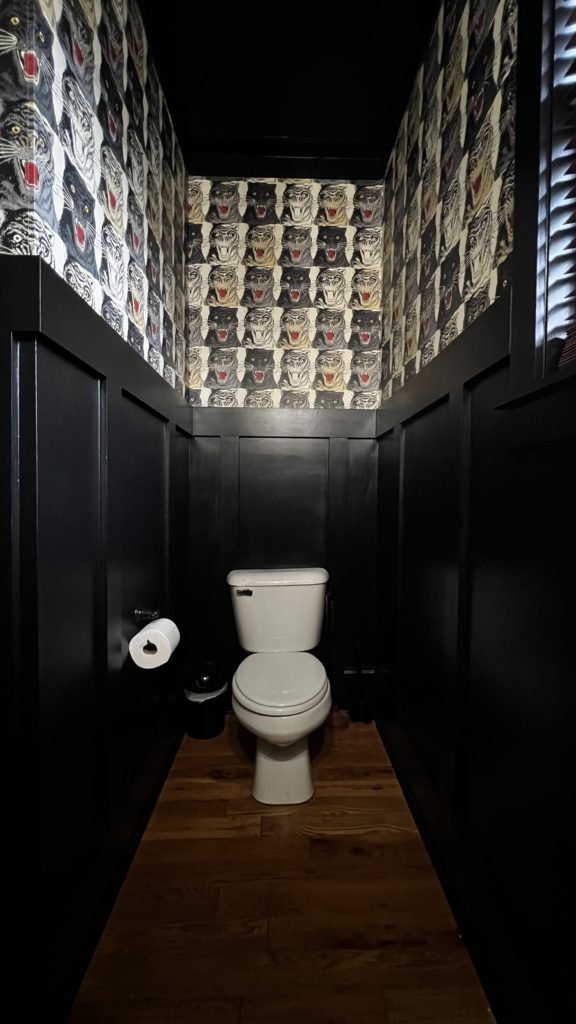
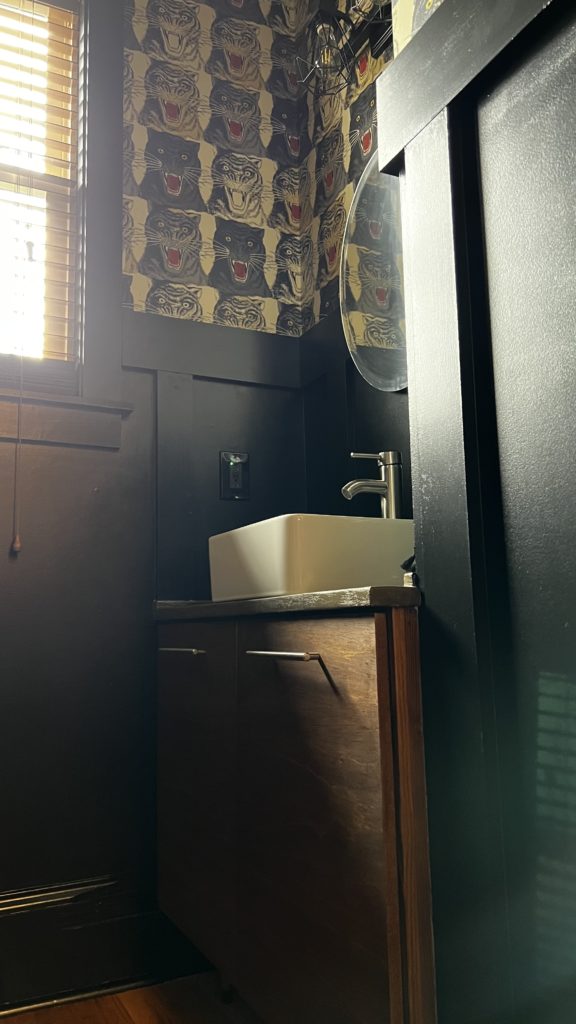
THE REVEAL
THE COST
All in all the grand total for this half-bath was in the $800 ballpark, with almost half of that going to the wallpaper. Do I regret it? Hell no. It took me two years to find a wallpaper I loved and I wasn’t going to wait another two to find one that was only maybe cheaper. I wanted something that popped as soon as you opened the door and boy, did I get it. So yes, it was worth DIYing and repurposing everything else in the space to get the wallpaper of my dreams.
Outside of the wallpaper, the remaining funds were used on paint, MDF for the battens, wood for the vanity doors, concrete for the vanity countertop, the vanity legs, and the sink + faucet. Everything else was repurposed from the original bathroom or found in the shed. Plus a hell of a lot of elbow grease.
THE PROCESS
The first half of the 8-week timeline was spent painting the ceiling, getting the horizontal batten up, and figuring out just how much wallpaper I was going to need. Of course, I ordered less than I needed and when I tried to order a second roll, the batch numbers didn’t match which caused the coloring to be ever so slightly off. Juuuuuust enough that it would drive me crazy looking at it every day. Cue the additional 7 days of wait time while I returned the original roll and waited for two rolls from the same batch number to arrive.
Actually hanging the wallpaper took two days. And that’s just because the lighting situation was atrocious with the light fixture already having been removed and the sole window being on the east side of the house. Had I had better foresight and figured out some sort of lighting set up, I could’ve had it done in a day. The hanging was also much easier than I anticipated. I was 100% expecting something that would test the edges of my neurotic perfectionism, but once you get the first piece hung with a plumb line (thank you laser level!) things move pretty quickly. The only downside was how thick the paper was which made it *very* hard to trim with even the sharpest of blades while the glue was wet. I ended up having to wait until everything was dry to trim, which resulted in having to go back and glue all the edges down after trimming because they’d started pulling up from the weight of the excess paper hanging off. I’m sure more practice would’ve avoided this whole situation. But this wouldn’t be fun if I wasn’t completely winging it after getting in way over my head, right?
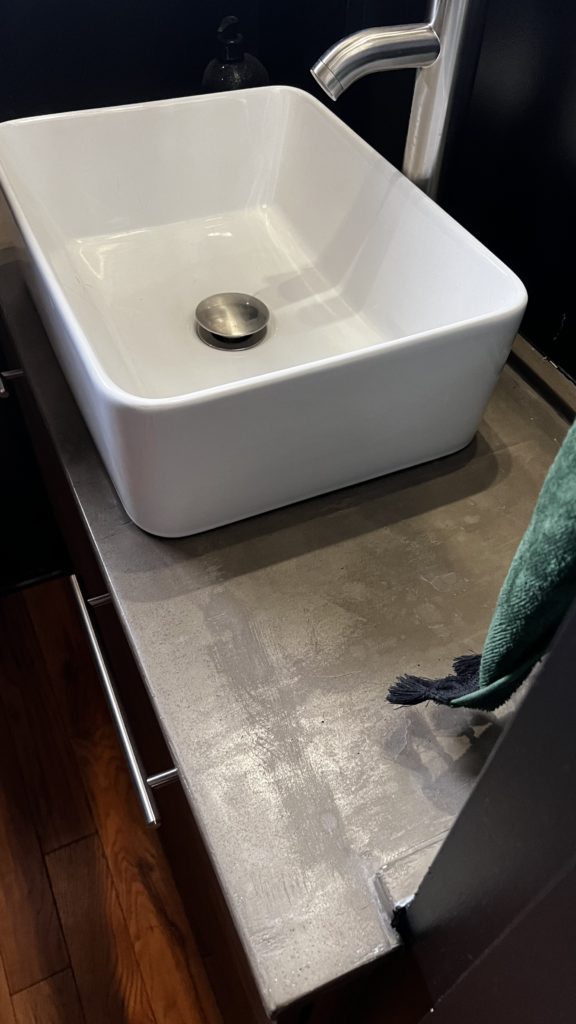
Once the wallpaper was up, it was off to the races with the vanity. I built the carcass out of scrap pieces from the shed, cutting it to fit perfectly inside the sink nook. The counter is also cut to perfectly fit the nook space that isn’t square because why would anything about this be easy. It was then layered with 4 layers of skimcoat. This is a concrete product that has the consistency of pancake batter, is easy to smooth, and sands down beautifully. With enough layers and sanding you get a gorgeous organic pattern with an ultra smooth finish. I ended up going all the way to 1000 grit with a layer of tung oil to seal + protect. The sink and faucet installation was pretty straight forward once we got the vanity + counter secured in place. I finished off the body with flat front doors cut from birch plywood and stained with special walnut stain. I also sealed these with tung oil—basically Tung Oil is my go-to sealer for everything at this point if you haven’t noticed.
The final days I pulled overtime the final week getting the vertical battens cut, drylocked, primed, and the entire bottom half of the wall painted black. I was so anxious this entire last week finally getting to see the bathroom come to life, that my ADHD urge to bounce to the next project was trying to kick into high gear. I can’t be the only one this happens to? The second I start to see a project have just enough that the end result is obvious, I’m ready to move onto the next challenge. No wonder I have no less than 100 half finished projects lying all over the house.
In true Meghan fashion, I was flipping breakers on and off while my husband tried to figure out which of the excessive wires went where on the new black light switches 15 minutes before I needed to get in the car and head out of town for the holiday weekend. Somehow we ended up operating the lights in the dining room from the bathroom fan switch, while the bathroom fan (and lights for that matter) stayed off. WTF? Of course the wrap up would be one giant ball of flaming chaos with me taking pictures as my husband is chucking my shit in the car and yelling at me that I need to gooooo. I pulled out of the driveway *exactly* on time. Maybe this is why I never learn?
WHAT WOULD I DO DIFFERENTLY
The wallpaper. And not necessarily the design, because again – I fucking LOVE it. But I didn’t realize when I was looking at wallpaper that the bigger the design, the more waste you have. So that estimate of how much space it covers was basically wildly inaccurate. What I really needed to know was how often the pattern repeated so I knew how much I was going to have to cut off from where the wallpaper ended on the wall to where the new piece would line up on the next drop. I had about 18in of waste every single drop. That adds up quick! Now I know it’s something to keep in mind for next time.
The order of operations. I would’ve hung the wallpaper first, then painted the horizontal batten, then hung it. That way the paint never would’ve needed to touch the wallpaper. I did the second coat of black after the wallpaper was hung, requiring me to tape off the wallpaper. Even though I used the delicate surfaces painters tape, it still tore the wallpaper. Did I cry over torn Gucci wallpaper? Yes, yes I did. Luckily, it’s not obvious. But as I’m the one that did the install, my eye goes straight to the tears every time I walk in the room.
The toilet. I kept hearing how much of a pain in the ass it is to move a toilet (plus how gross) so I left it in place for this project. This was an awful idea. If I had the strength, patience, and budget to rip it out and it get a new one—I 1000% would’ve done it while I was wallpapering. Maneuvering around the toilet in that small space with a ladder while trying to reach the top of the 9ft ceilings was beyond frustrating and made the work harder than it needed to be. It also made lining up the battens that fell behind the top of the toilet tricky, with the cut outs for the lid being larger than they should be. All future spaces will be completely clear to avoid the excessive cussing this issue alone drummed up.
The paint. I love black. That’s not a secret. And I would still paint the bathroom black. But I wouldn’t paint it “black.” Without getting into the science of it, straight black paint doesn’t exist. It’s comprised of other colors. So getting true straight black is hard, and especially unforgiving in a semi-gloss texture that reflects back every imperfection. In hindsight, I would’ve gone with Black Limousine by Behr. Or Sherwin Williams has a new dirty black out that I love called Tricorn Black.
Overall, I’m ecstatic it’s done and proud of myself for following my gut on such a bold design to the end. I can’t wait to see what kind of conversations this bold space sparks, and to continue to push my creative boundaries in other spaces.
Which space do you want to see next?
PRODUCT DETAILS + LINKS
Wallpaper: Gucci
Vanity Mirror: Here when we bought the house
Mirror Hanger: Drawer pull from Home Depot
Lighting: Here when we bought the house, swapped out shades with ones from Lowes
Vanity Sink*: Amazon
Faucet*: Amazon
Towel Hanger: Here when we bought the house
Toilet Paper Holder: Here when we bought the house
Vanity Body: DIY
Vanity Legs: Lowes
Vanity Pulls: Home Depot
Vanity Stain: Special Walnut from Home Depot
Vanity Counter: Concrete skimcoat from Home Depot
Board & Batten Paint: Black Behr Marquee from Home Depot in Semi Gloss
Ceiling Paint: Black Behr Scuff Defense Flat from Home Depot
Electrical: Outlet / Switch / Cover
**asteriks denote affiliate links for which I get a small commission anywhere from 0-4%.


you said: